Menu Bar

Showing posts with label holiday. Show all posts

Sunday, December 8, 2013

Cookies of Christmas - 2 Twists on the Classic "Blossom" Cookie

Peanut butter blossoms are a Christmas staple. Almost all cookie bakers have their cherished recipe for them and I'm no exception. For those of you that don't know what I mean - think those peanut butter cookies with the Hershey's Kiss in them.

As much as I'm a sucker for a classic though, I can't resist putting all those new kinds of kisses Hershey's has come out with to work. Here's my two twists on the classic. These were so good they might just become new classics in my house!


Chocolate Mint Blossoms


1/2 cup shortening
1/2 cup butter
1/2 cup sugar
1/2 cup brown sugar
1 egg
2 Tb milk
1 tsp peppermint extract
1 1/2 cups flour
3/4 cup cocoa
1 tsp baking soda
1/2 tsp salt
42 Mint Truffle Kisses (You can also use plain kisses if you like)
Additional sugar (to roll cookies in)


In a small bowl mix together flour, cocoa, baking soda and salt. Set aside. In a stand mixer cream together shorting, butter and sugars until light and fluffy. Mix in egg, milk and peppermint extract. Slowly add in the flour mixture. Mix until well combined. Refrigerate dough for one hour.

Put sugar in a small bowl. Roll chilled dough into ping pong sized balls. Roll in the sugar until coated.


Place on a cookie sheet and bake about 8 minutes, until almost done. While cookies are baking unwrap chocolate Hershey's Mint Truffle Kisses. If you can't find the mint truffle - substitute with another Kiss of your choice or with chocolate stars.
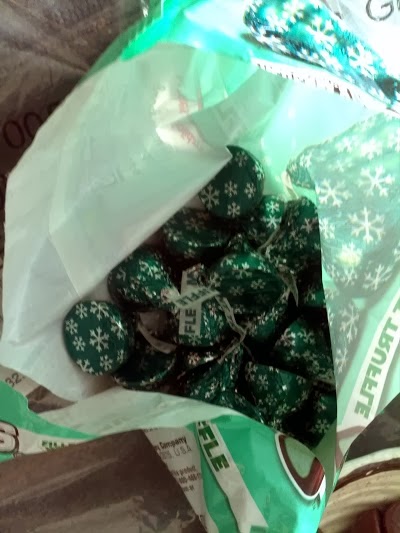
When cookies are almost done, pull out of the oven and press a Kiss gently down into the middle on them. Bake for another one minute to soften kiss. Remove from the oven. Allow to cool on the pan for about a minute until removing to a rack to finish cooling.


Candy Cane Mint Blossoms

1/2 cup shortening
1/2 cup butter
1 cup sugar
1 egg
2tb milk
1 tsp vanilla extract
2 cups flour
1 tsp baking soda
1/2 tsp salt
42 Candy Cane Kisses


In a small bowl mix together flour,baking soda and salt. Set aside. In a stand mixer cream together shorting, butter and sugar until light and fluffy. Mix in egg, milk and peppermint extract. Slowly add in the flour mixture. Mix until well combined. Refrigerate dough for one hour.


Put sugar in a small bowl. Roll chilled dough into ping pong sized balls. Roll in the sugar until coated. Place on a baking sheet and bake for about 8 minutes.

While the cookies are baking, unwrap your kisses.

When cookies are almost done, pull out of the oven and press a Kiss gently down into the middle on them. Bake for another one minute to soften kiss. Remove from the oven. Allow to cool on the pan for about a minute until removing to a rack to finish cooling.


Using this basic recipe the combination of extracts, chocolate and white dough and candy kisses is endless. Mix and match to find your new Christmas Classic.

Cookies of Christmas - Santa's Snowballs (A No Bake Recipe!)


While I love baking year-round, there is something about baking at Christmas time that is even more special. This is the time of the year that I dig into my cooking binder and pull out my favorite cookie recipes. Some of them are ones I've been enjoying since I was a little girl and now make for my own friends and family. Others are newer recipes that I've picked up along the way from friends, magazines and my own experimentation. All of them contribute to one of my favorite times of year. 

In this season of giving - I'd like to share with you my favorite Christmas recipes - my cookies of Christmas. I hope you enjoy them as much as we do. As a note - all of these recipes (unless noted) can be made as much as a month in advance of Christmas. I always start my Christmas baking at the end of November - making a few batches per weekend. By Christmas I have a huge variety of cookies for parties and to give as gifts. All I have to do is pull them out of the freezer and share!

The first cookies I'm sharing were my hands down favorites growing up. My grandma made them every year for Christmas. I loved them so much, many years she'd make me my own batch. I was always amazed by the layer effect and amazing filling. I could never figure out how she made them. I had visions of her spending hours in the kitchen making these special cookies.

When I grew older and she shared the recipe with me - I realize how easy - and ingenious - these cookies are. In the years I've taken up making these I've been asked for the recipe many times. Everyone is surprise when they find out the ingredients - now I'm sharing with you.

One secret to these is critical - make them ahead at least a week - preferably 2 - from when you want to serve them and freeze. The freezing softens them to a cake-like consistency and really makes the cookie. Trust me on this one - if you skip the freezing taste them immediately after making you won't understand why I love them so much.


Santa's Snowballs
1 box Vanilla Wafer Cookies
1 container spreadable strawberry cream cheese
1 container vanilla frosting
Coconut
Food coloring (optional)


Start my making an assembly line of all your ingredients - this will make it easier in the long run to do everything in order.

Take a vanilla wafer and spread with a small smear of cream cheese.


Top with another wafer.

Spread with an additional smear of cream cheese.

Top with a third wafer - you have layer wafer cream cheese ball of sorts.


Front the wafer ball with your frosting. (Sorry - there is no un-messy way to do this!)


Roll your wafer ball in coconut.


Once made, place your cookies in a freezer bag and freeze at least 1 week. Thaw and serve!


For a festive touch, you can tint your coconut red or green. Place the coconut in a plastic zipper bag. Add a few drops of food coloring and knead until coated.


Monday, July 8, 2013

More Patriotic Ideas

So a little delayed for 4th of July, but as I mentioned previously, we always have a big 4th party the Saturday after the 4th. Here's a few of my favorites to share with you. Unfortunately I didn't get as many pictures as I'd like, but I hope you still enjoy!

First - my favorite for the forth was these great flag fruit kabobs. I used traditional BBQ skewers and strung them with blueberries, strawberries and chunks of pound cake - I used frozen pound cake to make it easier to cut. I placed the skewers on a cookie sheet to form the flag pattern.
I was having so much fun with the flag skewers that I broke out the star cookie cutter and did up a few more with pound cake stars. 
The kabobs were a huge hit - especially with the kids. It was amazing to see them reach for the fruit over chips and brownies!


For drinks, I purchased 2 large glass drink dispensers and mixed up a batch of ice tea as well as a batch of lemonade. For the lemonade I used a star ice cube tray I found at the dollar store and made red, white and blue star ice cubes out of lemonade and food coloring in the week leading up to the party to jazz up the lemonade. In addition I made a great adults only "Star Spangled Sangria".

Star Spangled Sangria
1 Gallon White or Blush Wine
1/3 cup sugar
1 cup watermelon
1/4 cup blueberries
1/2 cup strawberries - halved or quartered

Pour wine into a large picture or drink dispenser. Add sugar and stir to dissolve. Add fruit to wine. Place in the fridge and allow to soak at least 2 hours prior to serving. Serve chilled.


Finally, since our gardens are the center of our party area, I wanted to add some patriotic touches. I found several medium and small sized rocks that my husband helped me spray paint red, white and blue. I dispersed these throughout the garden for a patriotic touch.


Happy belated 4th of July to you all! I hope you and your families all had a safe and fun holiday!


Friday, July 5, 2013

Pinwheel Centerpiece - Great for Any Holiday!

While the 4th of July ended for most folks yesterday. The Saturday after the 4th is always a time for a big family & friends BBQ at our home. While it's certainly a casual event, this year I wanted to get a little crafty with the decor and came up with this great centerpiece idea. The greatest part was I was able to assemble with things I already had laying around my house. This would be extremely easy to adapt to any holiday by using different colors and papers.

First we'll start with the pinwheels. To make these, you'll need the following.
- Square of colored or patterned paper (I used 4x4)
- Pencil
- Thumbtack
- Glue (a hot glue gun works best)
- Spray Paint *optional* 

To start, because I was using plain yellow pencils I had laying around the house, I started by having my husband spray paint them red and blue.

Next comes the pinwheel. Start with a square of paper. I find that 4x4 paper is the best size to be proportionate with traditional pencils. As a tip, if you start with 12x12 scrapbook paper, you can just divide into quarters.


Next fold the paper diagonally to make a triangle. Unfold and fold to opposite corners diagonally. Unfold again.


Now cut halfway up each fold. as shown below.
Once you finish cutting each fold, you should be left with 4 "flaps" of paper.

Place a dob of glue in the center. I use a hot glue gun for quick drying and hold. Fold the left hand corner of each flap into the center of the paper - the corner should stick in the glue.


Continue around the square, folding in each corner until your pinwheel is formed.
When you're all done, you'll be left with your pinwheel top.  

Take a thumbtack and push through the center of the pinwheel. Push the tack into the center of the pencil's eraser. 


Viloa! Your pinwheel is done! This is extremely easy to replicate with all different colors and patterns of paper to jazz up any holiday. I have also strung the pinwheel tops on ribbon to make ornaments or garland.

In this case however, I wanted to make a table centerpice. Since we're having a picnic BBQ, I selected simple mason jars. I also wanted to get my nephew, visiting from Florida and his friend involved, so we made one of our other favorite crafts to dress up the jars - colored salt.

Remember the color sand jar crafts at the fair? This is my low cost replica. This is an excellent and cheap way to keep the kids entertained year round. 

Start with plain white table salt. Pour into ziploc bags - one bag for each color you want to make. In this case, I wanted red, white and blue "sand" so I started with 2 bags (no need to color the white salt!) To each bag add a few drops of your desired color of food coloring. A little goes a long way - I promise - so don't add too much or you'll end up with chunks of coloring. Now is a great time to get the kids involved - work the food coloring throughout the salt in the bag until your color is mixed in. If the salt isn't as dark as you'd like, add another drop or 2 of coloring and work into the salt.

Once complete, pour into bowls (for ease of handling) and have the kids scoop layers of "sand" into   the jars to make a "sand art" effect. My nephew and his friend loved this part! 
Once you're all done, place pinwheels in the "sand' jar. 

These should be a big hit at our 4th of July party. Not only will we use for a centerpiece, but each kid at the party will get to take home their own pinwheel.

Happy Crafting!