Menu Bar

Showing posts with label baking. Show all posts

Sunday, December 8, 2013

Cookies of Christmas - 2 Twists on the Classic "Blossom" Cookie

Peanut butter blossoms are a Christmas staple. Almost all cookie bakers have their cherished recipe for them and I'm no exception. For those of you that don't know what I mean - think those peanut butter cookies with the Hershey's Kiss in them.

As much as I'm a sucker for a classic though, I can't resist putting all those new kinds of kisses Hershey's has come out with to work. Here's my two twists on the classic. These were so good they might just become new classics in my house!


Chocolate Mint Blossoms


1/2 cup shortening
1/2 cup butter
1/2 cup sugar
1/2 cup brown sugar
1 egg
2 Tb milk
1 tsp peppermint extract
1 1/2 cups flour
3/4 cup cocoa
1 tsp baking soda
1/2 tsp salt
42 Mint Truffle Kisses (You can also use plain kisses if you like)
Additional sugar (to roll cookies in)


In a small bowl mix together flour, cocoa, baking soda and salt. Set aside. In a stand mixer cream together shorting, butter and sugars until light and fluffy. Mix in egg, milk and peppermint extract. Slowly add in the flour mixture. Mix until well combined. Refrigerate dough for one hour.

Put sugar in a small bowl. Roll chilled dough into ping pong sized balls. Roll in the sugar until coated.


Place on a cookie sheet and bake about 8 minutes, until almost done. While cookies are baking unwrap chocolate Hershey's Mint Truffle Kisses. If you can't find the mint truffle - substitute with another Kiss of your choice or with chocolate stars.
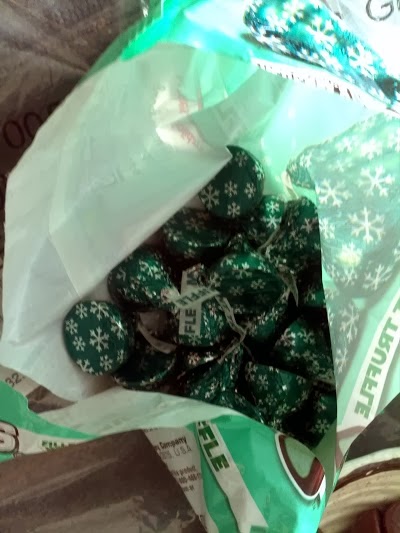
When cookies are almost done, pull out of the oven and press a Kiss gently down into the middle on them. Bake for another one minute to soften kiss. Remove from the oven. Allow to cool on the pan for about a minute until removing to a rack to finish cooling.


Candy Cane Mint Blossoms

1/2 cup shortening
1/2 cup butter
1 cup sugar
1 egg
2tb milk
1 tsp vanilla extract
2 cups flour
1 tsp baking soda
1/2 tsp salt
42 Candy Cane Kisses


In a small bowl mix together flour,baking soda and salt. Set aside. In a stand mixer cream together shorting, butter and sugar until light and fluffy. Mix in egg, milk and peppermint extract. Slowly add in the flour mixture. Mix until well combined. Refrigerate dough for one hour.


Put sugar in a small bowl. Roll chilled dough into ping pong sized balls. Roll in the sugar until coated. Place on a baking sheet and bake for about 8 minutes.

While the cookies are baking, unwrap your kisses.

When cookies are almost done, pull out of the oven and press a Kiss gently down into the middle on them. Bake for another one minute to soften kiss. Remove from the oven. Allow to cool on the pan for about a minute until removing to a rack to finish cooling.


Using this basic recipe the combination of extracts, chocolate and white dough and candy kisses is endless. Mix and match to find your new Christmas Classic.

Cookies of Christmas - Santa's Snowballs (A No Bake Recipe!)


While I love baking year-round, there is something about baking at Christmas time that is even more special. This is the time of the year that I dig into my cooking binder and pull out my favorite cookie recipes. Some of them are ones I've been enjoying since I was a little girl and now make for my own friends and family. Others are newer recipes that I've picked up along the way from friends, magazines and my own experimentation. All of them contribute to one of my favorite times of year. 

In this season of giving - I'd like to share with you my favorite Christmas recipes - my cookies of Christmas. I hope you enjoy them as much as we do. As a note - all of these recipes (unless noted) can be made as much as a month in advance of Christmas. I always start my Christmas baking at the end of November - making a few batches per weekend. By Christmas I have a huge variety of cookies for parties and to give as gifts. All I have to do is pull them out of the freezer and share!

The first cookies I'm sharing were my hands down favorites growing up. My grandma made them every year for Christmas. I loved them so much, many years she'd make me my own batch. I was always amazed by the layer effect and amazing filling. I could never figure out how she made them. I had visions of her spending hours in the kitchen making these special cookies.

When I grew older and she shared the recipe with me - I realize how easy - and ingenious - these cookies are. In the years I've taken up making these I've been asked for the recipe many times. Everyone is surprise when they find out the ingredients - now I'm sharing with you.

One secret to these is critical - make them ahead at least a week - preferably 2 - from when you want to serve them and freeze. The freezing softens them to a cake-like consistency and really makes the cookie. Trust me on this one - if you skip the freezing taste them immediately after making you won't understand why I love them so much.


Santa's Snowballs
1 box Vanilla Wafer Cookies
1 container spreadable strawberry cream cheese
1 container vanilla frosting
Coconut
Food coloring (optional)


Start my making an assembly line of all your ingredients - this will make it easier in the long run to do everything in order.

Take a vanilla wafer and spread with a small smear of cream cheese.


Top with another wafer.

Spread with an additional smear of cream cheese.

Top with a third wafer - you have layer wafer cream cheese ball of sorts.


Front the wafer ball with your frosting. (Sorry - there is no un-messy way to do this!)


Roll your wafer ball in coconut.


Once made, place your cookies in a freezer bag and freeze at least 1 week. Thaw and serve!


For a festive touch, you can tint your coconut red or green. Place the coconut in a plastic zipper bag. Add a few drops of food coloring and knead until coated.


Friday, December 6, 2013

Bread Day

What an crazy fall it has been! Between work, family time and everything else going on, it's been difficult to dedicate much time to anything in the house. However, as the weather gets colder as much as I don't look forward to driving with those little white flakes, I'm looking forward that seasonal excuse to get back into the home and enjoy those simple pleasures. Knitting, baking and housework...here I come!

This week our local grocery store had a great sale on flour (including wheat!) and sugar and provided a great opportunity to stock up. This inspired me to dedicate a batter part of my Sunday to baking fresh bread. It's amazing once you get started how easy it is to just keep going. I ended up with 7 loaves of bread and 4 dozen cinnamon rolls ... plenty to enjoy and still have leftovers in the refrigerator. Boy was I tired by the time I got done!

The stand out what this amazing whole wheat oatmeal bread. I love the texture of a good oatmeal bread and wanted to bring in the whole wheat flour. I ended up with this fabulous, hearty bread ...which makes an excellent toast spread with homemade jam!


Oatmeal Wheat Bread
3 cups wheat flour
1 cup oatmeal
2 TB butter
1 1/2 tsp salt
3 TB Molasses
2 teaspoons yeast (1 packet)
1 1/4 cup lukewarm milk

Warm your butter in the microwave for about 15 seconds, add milk and heat another 30 seconds to 1 minute until lukewarm. You DO NOT want your milk to be hot, or you will kill your yeasts. Pour the milk and butter mixture into the bowl of your mixer (or a large bowl if you will be mixing by hand) and add your yeast and salt. Using a whisk, gently mix together until your yeast is dissolved.

Add your remaining ingredients to the bowl, and using your dough hook, mix on your mixers lowest setting until the ingredients are combined. If you have a flour shield, you'll want to use it! Continuing on that lowest setting, kneading with your dough hook for an additional 5 minutes. You may need to sprinkle in some additional flour if your dough is too sticky to come together. Your dough is sufficiently kneaded when you press a finger into it gently and it springs back. Note - if kneading by hand, you will need to knead for about 8-10 minutes.

Prepare a large, clean bowl with cooking spray. Place your dough ball in the bowl, cover with a kitchen towel and allow to rise in a warm spot for about 1 hour.

After risen, punch down the dough, form into a log and place in a greased loaf pan. Cover again with your towel and allow it to rise for an additional hour.

Bake your bread at 350 for about 35 minutes.


Good luck keeping this one around long enough for it to cool!

Friday, September 6, 2013

Quick Tip: Make you Own Baking Mix

I can't tell you how many times I've run out of store bought baking mix and had to make a quick replacement from what I already had in my pantry. This has gotten so popular in my house, that I make my own all the time. It's extremely easy to make and store!


Homemade Baking Mix
10 cups flour
1 1/2 Tb Salt
1/4 cup baking powder
1 1/2 cups vegetable oil (or shortening)

Mix all together in a large bowl until crumbly texture. Store in airtight containers - I use clean mason jars which I have no shortage of around the house. Use it just like you would those store bought mixes!

Sunday, September 1, 2013

Hubby's Favorite Cinnamon Rolls


I have to admit - the power I gain over my husband with a little baking tends to go to my head. Of course this also means I have a hard time refusing him when he makes a special request. My husband has been begging for my homemade cinnamon rolls for a couple weeks, but it's been a bit crazy around the house. The long holiday weekend end has given me some extra time to whip up a batch for my hubby and gain a little power...this should earn me at least a few items on the honey do list!

Hubby's Favorite Cinnamon Rolls

Dough:
5 to 5 1/2 cups flour
1 Tb (1 packet) dry active yeast
1 1/4 cup milk
1/4 cup butter
1/4 cup sugar
1 tsp salt

Filling
6 Tb butter
1/2 cup brown sugar
1 tsp brown sugar

Glaze:
1 cup powder sugar
1 tsp vanilla
Milk (enough to make glaze consistency to drizzle)

Place flour and yeast in a large mixer bowl. In a saucepan on the stove, heat the 1 1/4 cup milk, 1/4 cup sugar, 1/4 cup butter and salt until mixture is warm and butter is almost melted (130-140 degrees).

Pour milk mixture into the flour. Mix with an electric mixer about 30 seconds on medium speed. Cover with flour shield or a kitchen towel (trust me on this) and them mix another 3 minutes on high. Turing speed down to low, add flour by the spoonful until all but about 3/4 or 1/2 cup has been added. Now either using your mixer's dough hook attachment or your hands and a floured surface, knead for 3 to 5 minutes mixing in the leftover flour as needed to get the right consistency.

One tip on using your stand mixer to knead the dough. I've found that I have the best results with consistency if I knead for the required amount of time with my stand mixer (5 minutes in this case) and then knead for an additional minute by hand adding some extra flour. Whatever method you use, don't worry too much if you have to add a bit of additional flour.


Grease a large kitchen bowl (you can use your mixer bowl if you clean and dry it first) with shortening or cooking spray. Place dough in the bowl. Cover with a kitchen towel and let rise for about 1 to 1 1/2 hours. During this time it should double in size. Dough is ready when you can gently press 2 fingers into the top and dough will return to original shape.


Punch down the dough and break into 2 even sections. Roll out first section on a floured cutting board or other surface into a large rectangle - about 12x8. Rub dough with 3 tb of the butter. Combine cinnamon and brown sugar. Sprinkle half the mixture over the roll. Roll dough into a log and cut into 8 slices.
 
Place slices on a large cookie sheet, allowing room between each for additional spreading. Repeat with second section of dough.
Cover rolls with a towel and allow to rise for 30 minutes until about doubled in size. Bake for 20 to 25 minutes at 350 degrees.
 
Once baked, move the cinnamon rolls to wire racks to cool. Mix your glaze ingredients together. While rolls are still warm, drizzle with glaze.
 
I find these are best enjoyed when still warm from the oven. My husband agrees!


Friday, August 16, 2013

How Ina Garten Ruined Powder Sugar Frosting for me Forever

I've always been one to make my own homemade frosting, but until recently I thought the good old powdered sugar, butter and milk method was the way to go. If I was really feeling decadent, I'd jazz it up with some peanut butter or cocoa powered (or both!)

Then, Ina Garten ruined me for frosting forever. I happened to be catching some rainy day tv while cutting coupons and watch as she made an amazing chocolate wedding cake with chocolate butter cream frosting. I had never before tried a recipe using egg whites to add volume and texture to frosting. I could not wait to try this frosting out!

While Ina's orignal receipe is not overly complicated, I was looking to simplify the concept just a bit. I ended up with a 4 ingredient variation that was sweet, light, airy and absolutely delicious. Now, while I certainly could (and did) eat this frosting right out of the bowl, I do recommend using it to actually...well you know...frost something. This recipe does make quite a bit batch of frosting. Chocolate cake was my frosting vehicle of choice for this round - I was able to stack and frost 2 nine inch rounds with plenty of frosting to spare.This frosting would look divine piled on chocolate cupcakes using a decorators tip and a frosting bag.


No Powder Sugar Chocolate Buttercream Frosting
4 room temperature egg whites
12oz Semisweet or Dark Chocolate Chips
1lb (4 sticks) room temperature butter
1 cup granulated sugar

Before you start - trust me on this one - make sure your egg whites and butter are REALLY room temperature. I know you want frosting now, but not doing this will leave you with egg whites that won't whip up correctly or chunks of butter in your frosting.

Start by separating out your egg whites and mix on medium until you have soft peaks - a "whisk" attachment uses bet for this if you have it. While your egg whites are processing, melt chocolate chips in the microwave (or double boiler). I always had bad luck with chocolate in the microwave, until I realized that patience is the only way to get it done. Microwave for 30 seconds to start and then keep microwaving, checking and stirring every 5-7 seconds until fully melted. Perhaps it's my microwave, but even 10 seconds at a time for me leads to burned chocolate. You may need to repeat the 5 second cycle for another minute or so, but it's better than ending up with gross chunky chocolate.

Once melted, set the chocolate aside while you finish the egg whites. At the soft peak stage, add you sugar to the whites gradually. Continue beating on medium speed until still peaks forms when you lift your beater out of the mixer. Now add in butter 1 tablespoon at a time - again trust me on this. Beat in between each add to smooth in the butter. Pour in chocolate and continue mixing until totally combined.

Now, just try to not eat all your frosting before you can get it onto it's destination. You will also be a powder sugar frosting convert. Thanks Ina...


Wednesday, July 10, 2013

Raspberry Chocolate Chip Muffins


One of my favorite parts of summer is berry picking behind our home. Our neighbor is always an incredibly good sport - humoring my love for berry picking and always willing to go with me. The raspberries are finally ready, and though not as easy to gather as my all time favorite blackberries, we were able to come away with enough of a stash yesterday for some fresh baked goods.

I decided to start with these Raspberry Chocolate Chip Muffins which I made by tweaking a basic blueberry muffing recipe. You could also make with store bought or frozen raspberries.

Raspberry Chocolate Chip Muffins

1/4 cup melted butter
3/4 cup milk
1 egg
2 tsp baking soda
2 cups flour
1/2 cup sugar
1 cup fresh raspberries
1/2 cup chocolate chips

Wisk together melted butter, milk, and egg. Add baking soda, flour, and sugar. Combine all ingredients but do not over-mix. Add raspberries and chocolate chips. Fold in gently.

Spray muffin tin with cooking spray. Scoop batter into muffin tins (I use an ice cream scoop to minimize messes). Bake in 350 oven for 12-15 minutes or until done.

Enjoy these muffins with a smear of butter and fresh cup of coffee (I did!).

Monday, June 24, 2013

Summer Sweets: Lena's Famous Chocolate Peanut Butter Pie

What better couple is there out there when it comes to dessert that chocolate and peanut butter. This pie takes it's to a whole new level to make an amazing summertime treat. Take it to your next picnic and your friends will be begging you for the recipe....and it's extremely easy to make. Plus you can make it from ingredients you probably already have hanging around the house. I'm sharing my homemade graham cracker crust recipe too, but you can certainly substitute a ready made crust from the store.

Chocolate Peanut Butter Pie

Crust:
1 1/2 cups graham cracker crumbs
1/3 cup butter
1/4 cup sugar

Filling
2 packages chocolate pudding
2 1/2 cups milk
1/3 cup peanut butter

1 container whipped topping

Prepare crumbs in blender and mix with butter and sugar until combined. Press firmly into 8 inch pie dish. Bake in 350 degree oven for 8-10 minutes to set crust. Allow to cool.

Combine dry pudding mix with milk and peanut butter. Whisk until smooth. Pour into graham cracker crust. Place in refrigerator to firm up for at least 30 minutes. Top with whipped topping. Chill until ready to serve.

If you like, garnish with chocolate syrup, crushed peanuts, chocolate chips or peanut butter cups.

Sunday, June 16, 2013

No Bake Chocolate Peanut Butter Bars

 When it's hot outside, the last thing I want to do is turn on my oven to bake. But what can I say...my family our friends are spoiled and have come to expect goodies. On those days that I can't stand the heat but need a sweet treat, I break out these bars - no baking required (not even stove top cooking!). They are super easy to make and always a big hit at summer BBQs and picnics. Be careful if you have a sweet tooth though - they are very addicting!


No Bake Chocolate Peanut Butter Bars

Bars:
1 1/2 cups fine graham crackers crumbs
3 cups powder sugar
18 oz peanut butter 
1 cup melted butter

Topping
12oz chocolate chips
1/4 cup butter

Prepare graham cracker crumbs - I use a blender to crush mine into fine crumbs. Mix all bar ingredients together. Make sure you butter is completely melted before you add it to the other ingredients, or you will have chunks of butter in your bars! Mix well and pat down into a 9 x 13 pan.

In a microwave safe bowl combine chocolate chips and butter. Microwave on low, checking and stirring every 5-10 seconds until chips are melted. Pour chocolate over peanut butter bars and spread evenly, covering the bars. Put in the refrigerator to cool for 10 minutes.

Remove bars from fridge and cut into squares. These are very rich so make sure to cut into small pieces (you can always have more than one!). I usually get 48 small squares out of my bars. Note - its important that you don't leave in the fridge for too long before cutting or your chocolate will be too hard. Once cut, let the bars sit for about 2 more hours to set. Store in airtight container. If it's really hot, I will put these in my fridge to avoid them getting too soft.

Enjoy - these go really well with your morning coffee or a glass of milk!