What an crazy fall it has been! Between work, family time and everything else going on, it's been difficult to dedicate much time to anything in the house. However, as the weather gets colder as much as I don't look forward to driving with those little white flakes, I'm looking forward that seasonal excuse to get back into the home and enjoy those simple pleasures. Knitting, baking and housework...here I come!
This week our local grocery store had a great sale on flour (including wheat!) and sugar and provided a great opportunity to stock up. This inspired me to dedicate a batter part of my Sunday to baking fresh bread. It's amazing once you get started how easy it is to just keep going. I ended up with 7 loaves of bread and 4 dozen cinnamon rolls ... plenty to enjoy and still have leftovers in the refrigerator. Boy was I tired by the time I got done!
The stand out what this amazing whole wheat oatmeal bread. I love the texture of a good oatmeal bread and wanted to bring in the whole wheat flour. I ended up with this fabulous, hearty bread ...which makes an excellent toast spread with homemade jam!
Oatmeal Wheat Bread
3 cups wheat flour
1 cup oatmeal
2 TB butter
1 1/2 tsp salt
3 TB Molasses
2 teaspoons yeast (1 packet)
1 1/4 cup lukewarm milk
Warm your butter in the microwave for about 15 seconds, add milk and heat another 30 seconds to 1 minute until lukewarm. You DO NOT want your milk to be hot, or you will kill your yeasts. Pour the milk and butter mixture into the bowl of your mixer (or a large bowl if you will be mixing by hand) and add your yeast and salt. Using a whisk, gently mix together until your yeast is dissolved.
Add your remaining ingredients to the bowl, and using your dough hook, mix on your mixers lowest setting until the ingredients are combined. If you have a flour shield, you'll want to use it! Continuing on that lowest setting, kneading with your dough hook for an additional 5 minutes. You may need to sprinkle in some additional flour if your dough is too sticky to come together. Your dough is sufficiently kneaded when you press a finger into it gently and it springs back. Note - if kneading by hand, you will need to knead for about 8-10 minutes.
Prepare a large, clean bowl with cooking spray. Place your dough ball in the bowl, cover with a kitchen towel and allow to rise in a warm spot for about 1 hour.
After risen, punch down the dough, form into a log and place in a greased loaf pan. Cover again with your towel and allow it to rise for an additional hour.
Bake your bread at 350 for about 35 minutes.
Good luck keeping this one around long enough for it to cool!
Menu Bar
Showing posts with label make your own. Show all posts
Friday, December 6, 2013
Monday, September 30, 2013
Weekday Lunchbox Chicken Salad
Like a lot of people my husband and I try to save money where we can by doing things for our selves. We use our freezer liberally to buy meat in bulk, grow our own vegetables and herbs, gather wild apples, blackberries, beechnuts and other forest finds, and eat most of our dinners at home. One spot though, where I really struggles is the workweek lunch. Not only is it easy to make excuses about packing a lunch, but I also fall prey to the "sure I'll go out to lunch with you...I can save mine for tomorrow" trap. A big reason why I think this happens is that I'm not really looking forward to eating those standard lunches.
To help beat this trap, I make on of my lunch out favorites at home. Nine times out of ten when I go to the local sandwich place for lunch break during the week I'm either ordering a chicken salad sub or a a low carb salad topped with chicken salad.
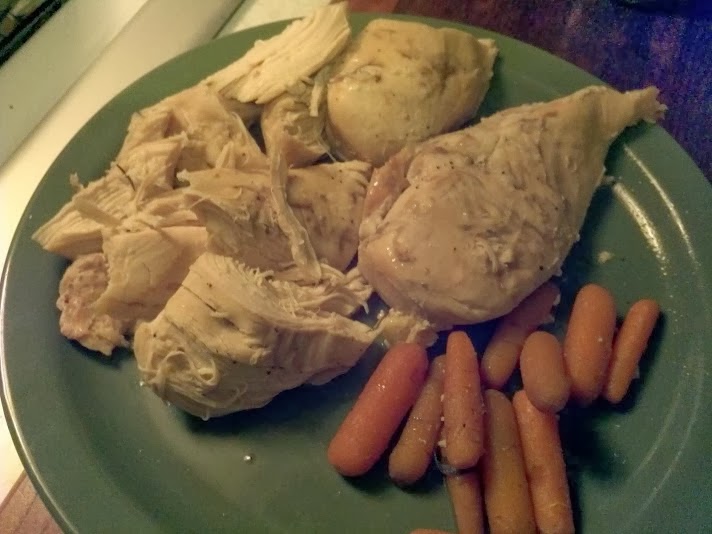
This chicken salad is a little different - I've incorporated standard chicken salad with sweet, savory and crunchy ingredients to make it fresh and different. I love on a sandwich, topping a salad, or just by itself! I have made this salad with boneless skinless chicken breasts which I've made in the slowcooker with fresh herbs, but you could easily use meat from other parts of the chicken.
Lunch Box Chicken Salad (6 servings)
3 cups slow cooker chicken (see below) or any shredded chicken
1 large apple, chopped
1 medium onion chopped
1/4 chopped walnuts
3/4 cup light mayonnaise
1 Tb Dijon mustard
Salt & Pepper to Taste
Add all your ingredients to a large dish and mix. You may add more or less mayonnaise to your personal taste. This will store well in the refrigerator for several days.
Basic Slow Cooker Chicken
3-4 large chicken breasts
1 cup baby or cut carrots
1 sprig rosemary
1 handful sage leaves
2 cloves garlic
1 tsp salt
1/2 tb pepper
Throw all your ingredients in the crock pot and cook on low for 6-8 hours.
To help beat this trap, I make on of my lunch out favorites at home. Nine times out of ten when I go to the local sandwich place for lunch break during the week I'm either ordering a chicken salad sub or a a low carb salad topped with chicken salad.
This chicken salad is a little different - I've incorporated standard chicken salad with sweet, savory and crunchy ingredients to make it fresh and different. I love on a sandwich, topping a salad, or just by itself! I have made this salad with boneless skinless chicken breasts which I've made in the slowcooker with fresh herbs, but you could easily use meat from other parts of the chicken.
Lunch Box Chicken Salad (6 servings)
3 cups slow cooker chicken (see below) or any shredded chicken1 large apple, chopped
1 medium onion chopped
1/4 chopped walnuts
3/4 cup light mayonnaise
1 Tb Dijon mustard
Salt & Pepper to Taste
Add all your ingredients to a large dish and mix. You may add more or less mayonnaise to your personal taste. This will store well in the refrigerator for several days.
Basic Slow Cooker Chicken3-4 large chicken breasts
1 cup baby or cut carrots
1 sprig rosemary
1 handful sage leaves
2 cloves garlic
1 tsp salt
1/2 tb pepper
Throw all your ingredients in the crock pot and cook on low for 6-8 hours.
This slow cooker chicken makes an awesome alternative to boiling chicken for chicken salad, soups, tacos, etc or tastes amazing on it's own!
Sunday, September 29, 2013
Viva Pesto - Mix and Match Ingredients for Non-Traditional Pesto
Probably one of the most popular herb dishes out there is pesto. I started making pesto after I began planting herbs in my garden. Even though I was cooking with them - they were multiplying in my garden so quickly that I didn't know what to do with them so I stumbled into making pesto. This led to a few problems though. First, I didn't always have the ingredients I needed to make a traditional pesto, (How many people reaaaaaly keep pine nuts in stock at all times?) Secondly - not that I had all this pesto, what was I supposed to do with it?
First I started with a basic pesto recipe. The trick is you can mix up and switch out nearly any of these ingredients. It's as easy as picking an ingredient from each column. Bonus ingredients are optional.
Here's a couple of match-ups I made recently.
Pecan Romano Basil Pesto
1/4 cup olive oil
1 cup basil
1/4 cup pecans
1/4 cup Romano cheese
1 small clove garlic
Start by adding the nuts and cheese to the blender and grinding up well. You can add all your ingredients at once, but I find if I do this I don't get the find ground on my nuts and cheese that I want. Add garlic and blend. Add basil and begin blending - drizzle in olive oil until pesto blends smoothly at your desired texture (about 1/4 cup).
Purple Basil Almond Pesto
1/4 cup olive oil
1 cup purple basil
1/4 cup almonds
1/4 cup Romano cheese
Purple basil is one of my favorites - it adds such fabulous color to my garden and my food!
Start by blending the almonds and Romano. Add basil and begin blending - drizzle in olive oil until pesto blends smoothly at your desired texture (about 1/4 cup).
Personally I love pesto so much that I'll eat it plain over pasta or spread on crackers, but you can also try some of these ideas:
Pesto Mayo - just mix pesto into plain mayonnaise for a great sandwich spread
Cold Pesto Pasta Salad - mix in with a bit of mayo and your favorite pasta, chill and serve
Pesto Grilled Cheese - spread fresh bread with pesto, add your favorite cheese and grill
Pesto Salad Dressing - add vinegar and additional olive oil - whisk and serve
Pesto can also be frozen for later use. Most folks I know that freeze pesto use ice cube trays. Once frozen, pop out the cubes and place them in a Ziploc Freezer bag to use later.
So get out there - pick some basil (or parsley, or oregano or...) and enjoy!
Monday, September 23, 2013
Quick Project Chalkboard Kitchen Canisters
Ever since chalkboard paint hit it big, I've been dying to try it out in a home craft project. Unfortunately, as much as a think about being crafty, I don't always get around to actually being crafty. Last week though, as a part of my kitchen organization overhaul, I came up with an idea for these cool kitchen canisters.
First, I started by purchasing these glass containers with metal tops. There's lots of options at your local craft store. I then lightly sanded the tops with fine grit sandpaper before spraying with 3 coats of Krylon chalkboard spray paint. I let dry for 24 hours before priming (rubbing all over with chalk and wiping off to prevent scratching). Then just label & store!
Wednesday, September 18, 2013
Pressure Canning Green Beans
My second crop of green beans is ready to harvest. This gives me a great chance to try out my new pressure canner - a birthday gift from my hubby!
I started by cutting the ends off my beans and cutting into bite sized pieces with a paring knife.

I started by cutting the ends off my beans and cutting into bite sized pieces with a paring knife.
Once all cut and rinsed, I packed tightly into clean, sterile pint mason jars.
Top the beans off with boiling water, leaving 1 inch of head space. Process in a pressure canner for 10 minutes.

Monday, September 16, 2013
A Week of Bounty - and the easiest way to freeze corn.
Our freezer runneth over this week! Last week, we went to pick up our fresh pig from the butcher. Good friends of ours purchased a pig and were willing to split with us. My freezer is packed full of meat as well as the pork fat (which the hubby and his friend will use for venison sausage during deer season!) I see a lot of pork chops in our future.
Our friends had never preserved corn before so I was happy to have them over and show them the easy method for freezing corn I grew up with. I can remember growing up - my father, a dairy farmer who always planted plenty of sweet corn in the summer - bringing home at least a dozen ears every night for dinner when corn was in season. My mom would boil them all up and anything not eaten at dinner would get processed and frozen. By the end of corn season we always had enough corn frozen up to enjoy through the whole winter!
Among our pork treasures is fresh bacon. The hubby put a nice batch of this right in the smoker - we can't wait to try it! I also got some nice ham slabs which I can't wait to try curing. If anyone has any tips for a first time ham curer let me know!
Several friends have asked me how I store meat in the freezer. To me purchasing meat is a big investment into future meals from my family - I don't want to leave anything to chance or freezer burn. I'm normally not a brand conscious person, but I wrap my meat in freezer paper and then store in Ziploc brand freezer bags. I haven't had as much luck as any other brand. Using this method, I typically can even get several extra months for anything that I freeze without sacrificing quality.
If the pork wasn't enough, our good friends also came into 12 dozens of free corn from a neighbor farmer who was about to toss it.
Our friends had never preserved corn before so I was happy to have them over and show them the easy method for freezing corn I grew up with. I can remember growing up - my father, a dairy farmer who always planted plenty of sweet corn in the summer - bringing home at least a dozen ears every night for dinner when corn was in season. My mom would boil them all up and anything not eaten at dinner would get processed and frozen. By the end of corn season we always had enough corn frozen up to enjoy through the whole winter!
I always start my corn by husking and getting off as much of the "hair" as possible. The husked ears go into a clean sink full of cold water. This helps get any remaining tassel off the corn.
On the stove bring a large pot of water to a boil. Adding the corn - a half dozen ears or so at a time - and blanch in the boiling water for about 6 minutes. Transfer the corn to a sink or clean plastic tub full of cold water. Once cool enough to handle, cut the corn away from the cob.
Scoop the corn into plastic bags in whatever serving size your family will normally use for 1 dinner. Freeze for up to 6 months.
When ready to serve warm on the stove top or in the microwave with a bit of butter and salt.
Now if only I could decide what to make for dinner tomorrow - pork chops and corn anyone?
Friday, September 13, 2013
Home Canned BBQ Sauce
In my house, we absolutely LOVE barbecue sauce and go through lots of it. So what better to do with a batch of extra tomatoes than make our own home canned sauce.
Home Canned BBQ Sauce
15 medium/10 large tomatoes
1 hot pepper (choose your pepper to match your desired heat)
1 sweet bell pepper
3/4 cup brown sugar
3/4 cup apple cider vinegar
2 cloves garlic
1 cup chopped onion
1 tb dry mustard
1 tb paprika
2 tb hickory smoke salt
1/4 teaspoon cayenne pepper
Once you've assembled your ingredients, you'll want to start be peeling your tomatoes and removing as much of the water and seeds as possible. I use the same method to peel tomatoes for all kinds of uses (this works well for peaches also). First you'll want to start with a large pot of boiling water.
I call this the three station method. Fill your sink with cold water. You'll also need a large bowl to hold the seeds, juice and peel and another bowl to hold your prepped tomatoes
.
Home Canned BBQ Sauce
15 medium/10 large tomatoes
1 hot pepper (choose your pepper to match your desired heat)
1 sweet bell pepper
3/4 cup brown sugar
3/4 cup apple cider vinegar
2 cloves garlic
1 cup chopped onion
1 tb dry mustard
1 tb paprika
2 tb hickory smoke salt
1/4 teaspoon cayenne pepper
Once you've assembled your ingredients, you'll want to start be peeling your tomatoes and removing as much of the water and seeds as possible. I use the same method to peel tomatoes for all kinds of uses (this works well for peaches also). First you'll want to start with a large pot of boiling water.
I call this the three station method. Fill your sink with cold water. You'll also need a large bowl to hold the seeds, juice and peel and another bowl to hold your prepped tomatoes
To easily remove the peel, drop your tomatoes in the boiling water. Let boil for about 1-2 minutes - you'll likely see the peel begin to lift. Transfer the tomatoes from the boiling water into the cold water in your sink to make cool enough to handle. The skin should easily pull away from the tomato flesh with a little encouragement from a paring knife. Cut out the core of the tomato and remove as much of the seeds and water as possible.
Once you've process all your tomatoes, transfer to a large pot on the stove. Add your other ingredients. Add remaining ingredients to your pot.
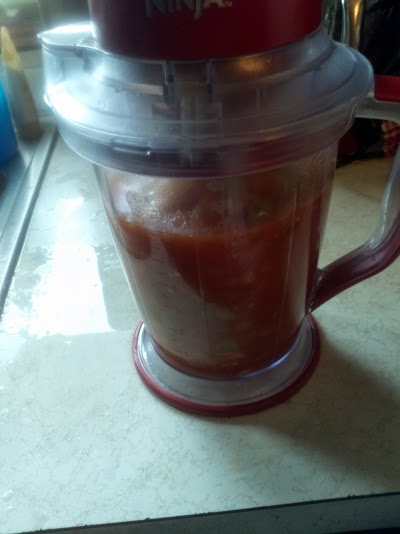
Bring to a boil over medium heat. Reduce to a simmer and boil for 30 minutes. Transfer all ingredients to a blender and blend until smooth.
Return the blended sauce to your pot. At this point, you have a nice consistency - similar to a chili sauce - and could go ahead an can now. However, I was really looking to get a lot closer to that smooth BBQ sauce consistency. To do this, simmer on low heat for an additional hour stirring occasionally. Run through the blender a second time.
To can the sauce, transfer to clean pint or half pint jars. Process in a boiling water bath for 25 minutes. You can also process in a pressure canner if desired for 20 minutes with 10lbs of pressure.
Enjoy!
Monday, September 9, 2013
Quick Tip: Fall Spice Room Air Freshner From Your Pantry
Here's a great tip to get the scent of fall spread throughout your home. To a small pot on your stove top add 2 cups water, 3 cinnamon sticks, 2 TB cloves and a tsp of vanilla. Heat to boiling and then simmer to scent your home. Add additional water throughout the day as needed.
Sunday, September 8, 2013
Rosemary Sage Herbed Vinegar
My passion for herbs and functional gardening leaves me with a lot of extra herbs. One of my favorite ways to use up extra fresh herbs - whether leftover from a recipe or not recently harvested and needed a little love - is to make homemade herbed vinegars. These vinegars make an amazing base for homemade salad dressings and are so easy - if you haven't done it before , you won't know why.
What you'll need:
2 sprigs fresh rosemary
1 sprig fresh sage
2 cups white vinegar
1 pint mason jar
Start by placing your herbs into the mason jar. I like to use large pieces of the sprig to give the finished jar a pretty look.
Pour your vinegar over the herbs and top with your canning lid. Let the herbs seep in the vinegar at least 24 hours before using. Use to make our own vinaigrette or give as a gift.
Friday, September 6, 2013
Quick Tip: Make you Own Baking Mix
I can't tell you how many times I've run out of store bought baking mix and had to make a quick replacement from what I already had in my pantry. This has gotten so popular in my house, that I make my own all the time. It's extremely easy to make and store!
Homemade Baking Mix
10 cups flour
1 1/2 Tb Salt
1/4 cup baking powder
1 1/2 cups vegetable oil (or shortening)
Mix all together in a large bowl until crumbly texture. Store in airtight containers - I use clean mason jars which I have no shortage of around the house. Use it just like you would those store bought mixes!
Tuesday, September 3, 2013
Labor-Freeish Day - Home Canned Applesauce and Hickory Brown Sugar Rib Rub
Happy belated labor (or hopefully labor-free) day to all! My husband and I had a wonderful day together and got lots done around the property.
The day started with a surprise from my husband - he insisted that he had found a wild cherry fruit tree near our home with nickle sized fruit. A quick ride confirmed my suspicion that what he had found was a huge crab apple tree. Despite being literally surrounded by wild apple trees, these is the first real crab apple tree we've found. I can't wait to try making some crab apple jelly once the fruit ripens fully. In addition we found wild pear and elderberries that should be ready soon.
Not one to disappoint with unripe "cherries" my husband recommended taking a short walk to pick apples. While we are working to cultivate our own home orchard most of our trees are not fruit bearing yet. Luckily for us, we are literally surrounded by wild apple trees. I ended up picking 2 large buckets of fresh sweet apples while sampling several trees that should be ready in the coming weeks.
Hickory Brown Sugar Rib Rub
1 1/2 cups brown sugar
3 Tb Hickory Smoke Salt
1 Tb paprika
2 tsp Garlic Powder
2 tsp dried Oregano
The key to this rub is the hickory smoke salt. I have just recently discovered this and couldn't wait to incorporate into a rib rub. I buy mine at a bulk spice place, but now that I've started using it I've noticed it in several of my local grocery stores. This batch should provide enough rub to do a half rack of ribs. If you have extra rub, you can store it in a mason jar with your other spices.
Slather your ribs with your prepared rub, and cook in your smoker to your manufacturer's specs for ribs. We used apple and hickory wood chips in the smoker to highlight the sweet and smoky already present into the rib rub. The final ribs came out extremely tender with a nice crust.
The day started with a surprise from my husband - he insisted that he had found a wild cherry fruit tree near our home with nickle sized fruit. A quick ride confirmed my suspicion that what he had found was a huge crab apple tree. Despite being literally surrounded by wild apple trees, these is the first real crab apple tree we've found. I can't wait to try making some crab apple jelly once the fruit ripens fully. In addition we found wild pear and elderberries that should be ready soon.
Not one to disappoint with unripe "cherries" my husband recommended taking a short walk to pick apples. While we are working to cultivate our own home orchard most of our trees are not fruit bearing yet. Luckily for us, we are literally surrounded by wild apple trees. I ended up picking 2 large buckets of fresh sweet apples while sampling several trees that should be ready in the coming weeks.
Fresh apples beg to be made into all kinds of delicious baked goods - pies, breads, cakes and the like. I quickly put these to work making one of my favorites - homemade apple sauce!
Apple Sauce
15 lbs Apples
5 cups water
10 Tbs lemon juice
4 cups sugar
2 Tb cinnamon
Before you get started, pour your water into a large, heavy bottom pot. Add lemon juice. Peel your apples. If you have a apple peeler and corer - this is a great way to put it to use. The rest of us will have to be satisfied with our paring knives.
Cut and core the apples. Rough cut into chunks - no need to be perfect here.
Drop chunks into your pot of lemon water to help minimize browning. If you still get a little bit of browning - no worries - it won't hurt your finished product - I promise!
Once you've peeled your full amount of apples, transfer your pot to the stove. If you plan to can your finished sauce, this is a good time to also put your canning pot on to boil to sterilize your jars.
Bring your apples to a boil over medium heat and then reduce to simmer. Simmer 10-20 minutes, until your apples are tender. How long it takes will depend on how small you cut your apple chunks. Take your apples off the heat and run through a food mill to soften. If, like me, you don't have a food mill - improvise! I used the grinder attachment for my stand mixer. You could also just smash up the apples with a potato masher!
Return your applesauce to your pot. Add sugar and cinnamon and over low heat, stir until sugar is fully dissolved. From here, your applesauce can be eaten as is or stored by either freezing or canning.
To can your applesauce, ladle hot sauce into sterilized pint jars.
Process via boiling water method for 10 minutes.
Turn off heat an allow to sit in the water for 5 minutes before transferring to a towel covered counter or table to cool and seal. Let sit for 12 hours, check seals and store in a cool, dry place. Makes 9 pints.
If the apple picking wasn't enough, it was also time for one of our treks through the woods looking for dead trees that need to be cut to cull out the woods, avoid falling trees and get wood for our home for the winter. My husband and I walked through marking trees for friends and family to help us take down and gather.
Athena couldn't wait to get up to the woods. As you can tell - she was way ahead of us and pretty impatient for us to get there!
I got to play with some spray paint marking trees to come down.
I found a toad hiding out in a log - how neat is that?
I think these logs with the rotted out center have a very cool look - the wheels are turning on a mini furniture project!
Athena was thoroughly tired out when we got back home!
As a reward for our work in the woods, we celebrated with another star of our day - these delicious smoker ribs with homemade rub. We're still fairly new to smoking, but I think these rub combination turned out excellent!
Hickory Brown Sugar Rib Rub
1 1/2 cups brown sugar3 Tb Hickory Smoke Salt
1 Tb paprika
2 tsp Garlic Powder
2 tsp dried Oregano
The key to this rub is the hickory smoke salt. I have just recently discovered this and couldn't wait to incorporate into a rib rub. I buy mine at a bulk spice place, but now that I've started using it I've noticed it in several of my local grocery stores. This batch should provide enough rub to do a half rack of ribs. If you have extra rub, you can store it in a mason jar with your other spices.
Slather your ribs with your prepared rub, and cook in your smoker to your manufacturer's specs for ribs. We used apple and hickory wood chips in the smoker to highlight the sweet and smoky already present into the rib rub. The final ribs came out extremely tender with a nice crust.
After a such an eventful day including some excellent food, there's little to do to top it. I settled for a cold microbrew, a long soak in the whirlpool tub and a good book. Happy Labor Day All!
Subscribe to:
Posts (Atom)