Menu Bar

Showing posts with label recipe. Show all posts

Sunday, December 8, 2013

Cookies of Christmas - 2 Twists on the Classic "Blossom" Cookie

Peanut butter blossoms are a Christmas staple. Almost all cookie bakers have their cherished recipe for them and I'm no exception. For those of you that don't know what I mean - think those peanut butter cookies with the Hershey's Kiss in them.

As much as I'm a sucker for a classic though, I can't resist putting all those new kinds of kisses Hershey's has come out with to work. Here's my two twists on the classic. These were so good they might just become new classics in my house!


Chocolate Mint Blossoms


1/2 cup shortening
1/2 cup butter
1/2 cup sugar
1/2 cup brown sugar
1 egg
2 Tb milk
1 tsp peppermint extract
1 1/2 cups flour
3/4 cup cocoa
1 tsp baking soda
1/2 tsp salt
42 Mint Truffle Kisses (You can also use plain kisses if you like)
Additional sugar (to roll cookies in)


In a small bowl mix together flour, cocoa, baking soda and salt. Set aside. In a stand mixer cream together shorting, butter and sugars until light and fluffy. Mix in egg, milk and peppermint extract. Slowly add in the flour mixture. Mix until well combined. Refrigerate dough for one hour.

Put sugar in a small bowl. Roll chilled dough into ping pong sized balls. Roll in the sugar until coated.


Place on a cookie sheet and bake about 8 minutes, until almost done. While cookies are baking unwrap chocolate Hershey's Mint Truffle Kisses. If you can't find the mint truffle - substitute with another Kiss of your choice or with chocolate stars.
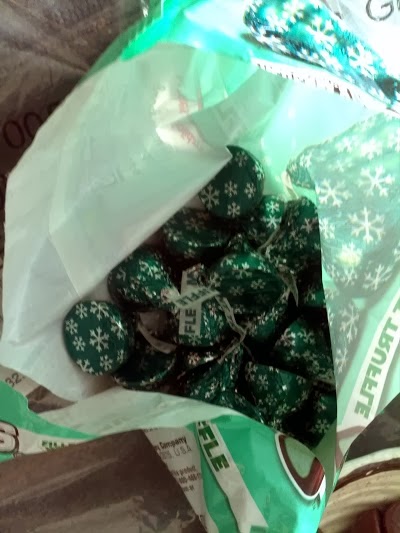
When cookies are almost done, pull out of the oven and press a Kiss gently down into the middle on them. Bake for another one minute to soften kiss. Remove from the oven. Allow to cool on the pan for about a minute until removing to a rack to finish cooling.


Candy Cane Mint Blossoms

1/2 cup shortening
1/2 cup butter
1 cup sugar
1 egg
2tb milk
1 tsp vanilla extract
2 cups flour
1 tsp baking soda
1/2 tsp salt
42 Candy Cane Kisses


In a small bowl mix together flour,baking soda and salt. Set aside. In a stand mixer cream together shorting, butter and sugar until light and fluffy. Mix in egg, milk and peppermint extract. Slowly add in the flour mixture. Mix until well combined. Refrigerate dough for one hour.


Put sugar in a small bowl. Roll chilled dough into ping pong sized balls. Roll in the sugar until coated. Place on a baking sheet and bake for about 8 minutes.

While the cookies are baking, unwrap your kisses.

When cookies are almost done, pull out of the oven and press a Kiss gently down into the middle on them. Bake for another one minute to soften kiss. Remove from the oven. Allow to cool on the pan for about a minute until removing to a rack to finish cooling.


Using this basic recipe the combination of extracts, chocolate and white dough and candy kisses is endless. Mix and match to find your new Christmas Classic.

Cookies of Christmas - Santa's Snowballs (A No Bake Recipe!)


While I love baking year-round, there is something about baking at Christmas time that is even more special. This is the time of the year that I dig into my cooking binder and pull out my favorite cookie recipes. Some of them are ones I've been enjoying since I was a little girl and now make for my own friends and family. Others are newer recipes that I've picked up along the way from friends, magazines and my own experimentation. All of them contribute to one of my favorite times of year. 

In this season of giving - I'd like to share with you my favorite Christmas recipes - my cookies of Christmas. I hope you enjoy them as much as we do. As a note - all of these recipes (unless noted) can be made as much as a month in advance of Christmas. I always start my Christmas baking at the end of November - making a few batches per weekend. By Christmas I have a huge variety of cookies for parties and to give as gifts. All I have to do is pull them out of the freezer and share!

The first cookies I'm sharing were my hands down favorites growing up. My grandma made them every year for Christmas. I loved them so much, many years she'd make me my own batch. I was always amazed by the layer effect and amazing filling. I could never figure out how she made them. I had visions of her spending hours in the kitchen making these special cookies.

When I grew older and she shared the recipe with me - I realize how easy - and ingenious - these cookies are. In the years I've taken up making these I've been asked for the recipe many times. Everyone is surprise when they find out the ingredients - now I'm sharing with you.

One secret to these is critical - make them ahead at least a week - preferably 2 - from when you want to serve them and freeze. The freezing softens them to a cake-like consistency and really makes the cookie. Trust me on this one - if you skip the freezing taste them immediately after making you won't understand why I love them so much.


Santa's Snowballs
1 box Vanilla Wafer Cookies
1 container spreadable strawberry cream cheese
1 container vanilla frosting
Coconut
Food coloring (optional)


Start my making an assembly line of all your ingredients - this will make it easier in the long run to do everything in order.

Take a vanilla wafer and spread with a small smear of cream cheese.


Top with another wafer.

Spread with an additional smear of cream cheese.

Top with a third wafer - you have layer wafer cream cheese ball of sorts.


Front the wafer ball with your frosting. (Sorry - there is no un-messy way to do this!)


Roll your wafer ball in coconut.


Once made, place your cookies in a freezer bag and freeze at least 1 week. Thaw and serve!


For a festive touch, you can tint your coconut red or green. Place the coconut in a plastic zipper bag. Add a few drops of food coloring and knead until coated.


Friday, December 6, 2013

Bread Day

What an crazy fall it has been! Between work, family time and everything else going on, it's been difficult to dedicate much time to anything in the house. However, as the weather gets colder as much as I don't look forward to driving with those little white flakes, I'm looking forward that seasonal excuse to get back into the home and enjoy those simple pleasures. Knitting, baking and housework...here I come!

This week our local grocery store had a great sale on flour (including wheat!) and sugar and provided a great opportunity to stock up. This inspired me to dedicate a batter part of my Sunday to baking fresh bread. It's amazing once you get started how easy it is to just keep going. I ended up with 7 loaves of bread and 4 dozen cinnamon rolls ... plenty to enjoy and still have leftovers in the refrigerator. Boy was I tired by the time I got done!

The stand out what this amazing whole wheat oatmeal bread. I love the texture of a good oatmeal bread and wanted to bring in the whole wheat flour. I ended up with this fabulous, hearty bread ...which makes an excellent toast spread with homemade jam!


Oatmeal Wheat Bread
3 cups wheat flour
1 cup oatmeal
2 TB butter
1 1/2 tsp salt
3 TB Molasses
2 teaspoons yeast (1 packet)
1 1/4 cup lukewarm milk

Warm your butter in the microwave for about 15 seconds, add milk and heat another 30 seconds to 1 minute until lukewarm. You DO NOT want your milk to be hot, or you will kill your yeasts. Pour the milk and butter mixture into the bowl of your mixer (or a large bowl if you will be mixing by hand) and add your yeast and salt. Using a whisk, gently mix together until your yeast is dissolved.

Add your remaining ingredients to the bowl, and using your dough hook, mix on your mixers lowest setting until the ingredients are combined. If you have a flour shield, you'll want to use it! Continuing on that lowest setting, kneading with your dough hook for an additional 5 minutes. You may need to sprinkle in some additional flour if your dough is too sticky to come together. Your dough is sufficiently kneaded when you press a finger into it gently and it springs back. Note - if kneading by hand, you will need to knead for about 8-10 minutes.

Prepare a large, clean bowl with cooking spray. Place your dough ball in the bowl, cover with a kitchen towel and allow to rise in a warm spot for about 1 hour.

After risen, punch down the dough, form into a log and place in a greased loaf pan. Cover again with your towel and allow it to rise for an additional hour.

Bake your bread at 350 for about 35 minutes.


Good luck keeping this one around long enough for it to cool!

Sunday, September 29, 2013

Viva Pesto - Mix and Match Ingredients for Non-Traditional Pesto

Probably one of the most popular herb dishes out there is pesto. I started making pesto after I began planting herbs in my garden. Even though I was cooking with them - they were multiplying in my garden so quickly that I didn't know what to do with them so I stumbled into making pesto. This led to a few problems though. First, I didn't always have the ingredients I needed to make a traditional pesto, (How many people reaaaaaly keep pine nuts in stock at all times?) Secondly - not that I had all this pesto, what was I supposed to do with it?

First I started with a basic pesto recipe. The trick is you can mix up and switch out nearly any of these ingredients. It's as easy as picking an ingredient from each column. Bonus ingredients are optional.

Here's a couple of match-ups I made recently.


Pecan Romano Basil Pesto

1/4 cup olive oil
1 cup basil
1/4 cup pecans
1/4 cup Romano cheese
1 small clove garlic


Start by adding the nuts and cheese to the blender and grinding up well. You can add all your ingredients at once, but I find if I do this I don't get the find ground on my nuts and cheese that I want. Add garlic and blend. Add basil and begin blending - drizzle in olive oil until pesto blends smoothly at your desired texture (about 1/4 cup).


Purple Basil Almond Pesto
1/4 cup olive oil
1 cup purple basil
1/4 cup almonds
1/4 cup Romano cheese

Purple basil is one of my favorites - it adds such fabulous color to my garden and my food!

Start by blending the almonds and Romano. Add basil and begin blending - drizzle in olive oil until pesto blends smoothly at your desired texture (about 1/4 cup).


Personally I love pesto so much that I'll eat it plain over pasta or spread on crackers, but you can also try some of these ideas:
Pesto Mayo - just mix pesto into plain mayonnaise for a great sandwich spread
Cold Pesto Pasta Salad - mix in with a bit of mayo and your favorite pasta, chill and serve
Pesto Grilled Cheese - spread fresh bread with pesto, add your favorite cheese and grill
Pesto Salad Dressing - add vinegar and additional olive oil - whisk and serve

Pesto can also be frozen for later use. Most folks I know that freeze pesto use ice cube trays. Once frozen, pop out the cubes and place them in a Ziploc Freezer bag to use later.

So get out there - pick some basil (or parsley, or oregano or...) and enjoy!


Tuesday, September 24, 2013

Hubby Makes Dinner - Awesome Easy Crepes

On of my favorite stories that my husband tells from growing up is the story of his pancakes. His grandmother and later father made pancakes for him from the time he was very little and they were one of his favorite dishes. Then, one day, he went over to a friends house and the friend's parents made the kids pancakes. He was excited - pancakes were one of his favorite dishes afterall. However what was served to his wasn't recognizable to him - they were thick, doughy (what the rest of us think of as pancakes I guess!). What he had grown up with were Swedish Pancakes - more like a crepe that a traditional pancake which to this day he isn't a fan of!

Fast forward to last night. I was working on cleaning up the kitchen before making dinner. In walks my husband who offers, out of the blue, to make these Swedish pancakes for me. Here's his family recipe which I think you'll find incredibly easy!


Swedish Pancakes
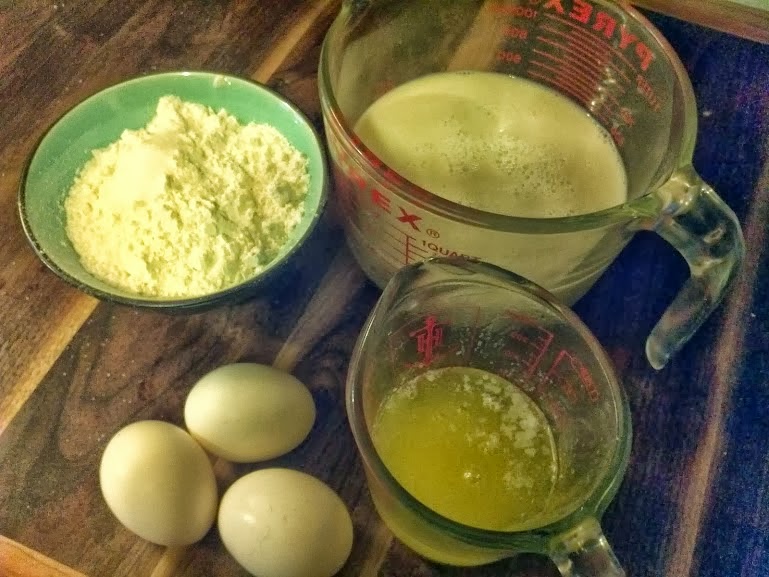
3 eggs
2 cups milk
1 cup flour
6 Tb butter
1/2 tsp salt


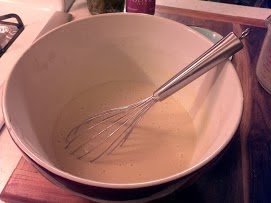
Start by whisking the eggs with 1/2 cup of the milk for 2 minutes. Add in entire cup of flour and whisk into a thick, smooth batter - this is your opportunity to get the batter smooth, so make sure you do it right!


Whisk in salt and remaining milk. Add the butter and whisk well.


Prepare a hot pan or skillet with a nice big pat of butter.


Cook on one side until the pancake is bubble and easy to flip. Flip and finish cooking on the other side. Here's a picture of one just about ready to flip!


The serving options for your crepe are endless, I like putting jam in the middle of mine (I like blackberry, hubby likes strawberry) and topping with power sugar or real maple syrup. However, you could just as easily fill with cream cheese or fresh fruit. You can also go savory - try filling with herbed ricotta cheese and top with marinara! 


I find that a lot of people are intimidated by making Swedish Pancakes or crepes, but it really is as easy as it sounds.

Wednesday, September 18, 2013

Pressure Canning Green Beans

My second crop of green beans is ready to harvest. This gives me a great chance to try out my new pressure canner - a birthday gift from my hubby!

I started by cutting the ends off my beans and cutting into bite sized pieces with a paring knife.

Once all cut and rinsed, I packed tightly into clean, sterile pint mason jars.
Top the beans off with boiling water, leaving 1 inch of head space. Process in a pressure canner for 10 minutes.


Friday, September 13, 2013

Home Canned BBQ Sauce

In my house, we absolutely LOVE barbecue sauce and go through lots of it. So what better to do with a batch of extra tomatoes than make our own home canned sauce.

Home Canned BBQ Sauce
15 medium/10 large tomatoes
1 hot pepper (choose your pepper to match your desired heat)
1 sweet bell pepper
3/4 cup brown sugar
3/4 cup apple cider vinegar
2 cloves garlic
1 cup chopped onion
1 tb dry mustard
1 tb paprika
2 tb hickory smoke salt
1/4 teaspoon cayenne pepper


Once you've assembled your ingredients, you'll want to start be peeling your tomatoes and removing as much of the water and seeds as possible. I use the same method to peel tomatoes for all kinds of uses (this works well for peaches also). First you'll want to start with a large pot of boiling water.

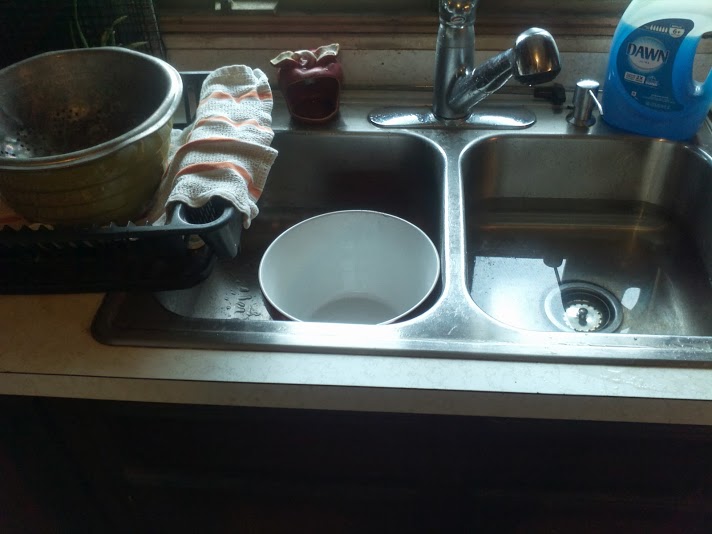
I call this the three station method. Fill your sink with cold water. You'll also need a large bowl to hold the seeds, juice and peel and another bowl to hold your prepped tomatoes

To easily remove the peel, drop your tomatoes in the boiling water. Let boil for about 1-2 minutes - you'll likely see the peel begin to lift. Transfer the tomatoes from the boiling water into the cold water in your sink to make cool enough to handle. The skin should easily pull away from the tomato flesh with a little encouragement from a paring knife. Cut out the core of the tomato and remove as much of the seeds and water as possible. 


Once you've process all your tomatoes, transfer to a large pot on the stove. Add your other ingredients. Add remaining ingredients to your pot.

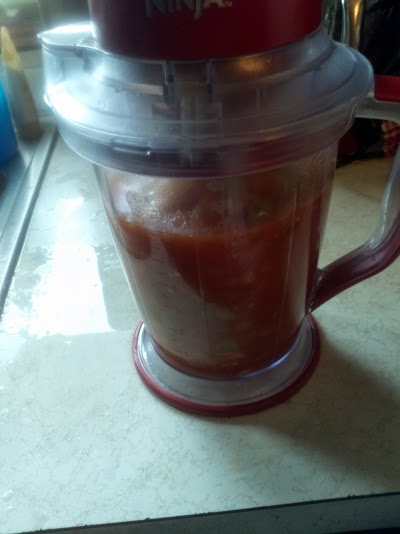
Bring to a boil over medium heat. Reduce to a simmer and boil for 30 minutes. Transfer all ingredients to a blender and blend until smooth.

Return the blended sauce to your pot. At this point, you have a nice consistency - similar to a chili sauce - and could go ahead an can now. However, I was really looking to get a lot closer to that smooth BBQ sauce consistency. To do this, simmer on low heat for an additional hour stirring occasionally. Run through the blender a second time. 

To can the sauce, transfer to clean pint or half pint jars. Process in a boiling water bath for 25 minutes. You can also process in a pressure canner if desired for 20 minutes with 10lbs of pressure.


Enjoy!


.


Wednesday, September 11, 2013

Fall-la Fagioli

It's not technically fall yet - but it's starting to feel like it outside. Crisp autumn Sundays always make me want to cook comfort food - and with a super busy weekend for my household, a crockpot soup is the way to go. This recipe is my take on a Pasta Fagioli - perfect for a quick comfort fall mean.

Fall-la Fagioli
1 Quart (32 oz) canned tomatoes
2 cans chick peas (or your choice bean)
1 lb cooked Italian sausage
1 medium onion, chopped
1 clove garlic
8 oz noodles

Place your tomatoes in your crockpot. I use home canned tomatoes, but if you don't have any you could use canned whole or diced tomatos from your grocery store.

Drain and lightly rise the chickpeas. Add to your crock. If you don't like or have chickpeas, you can substitute any canned bean in your pantry you like. This is a no fuss meal - you don't have to be exact.


Next, chop up the onions and finely mince the garlic. Add this to your crockpot as well.

Add your cooked sausage to the crockpot as well. I used chopped up leftover links from a previous night's dinner.


Turn your crockpot on low and cook for 6 hours. About an hour for serving add your noodles and continue to cook on low until noodles are tender. I like to break up those last few lasagna noodles that are always left in the box after I make a big pan and use as my pasta, but any noodles will do. You may need to adjust cooking time depending on your type of pasta.


Serve with toasted garlic bread.


Friday, September 6, 2013

Quick Tip: Make you Own Baking Mix

I can't tell you how many times I've run out of store bought baking mix and had to make a quick replacement from what I already had in my pantry. This has gotten so popular in my house, that I make my own all the time. It's extremely easy to make and store!


Homemade Baking Mix
10 cups flour
1 1/2 Tb Salt
1/4 cup baking powder
1 1/2 cups vegetable oil (or shortening)

Mix all together in a large bowl until crumbly texture. Store in airtight containers - I use clean mason jars which I have no shortage of around the house. Use it just like you would those store bought mixes!

Monday, September 2, 2013

Jammin Blackberry Style - No Fail Blackberry Jam

I can't tell you how excited I get every year for blackberry picking time. I absolutely love suiting up and heading out to our "secret" blackberry spot where huge fresh ripe berries can be found in every direction. This past weekend, my neighbor and I headed back on our 4 wheelers to get our hands on some of these sesasonal treats.

Trekking back home a couple hours later, I can't help but think of all the amazing things I will make with my berries - cobbler, muffins and the like. However, none of these beat a nice big batch of blackberry jam!

No Fail Blackberry Jam

8 cups fresh blackberries
6 tsp lemon juice
9 Tbs pectin
6 cups sugar

Fill a large canner pot with water and bring to a boil. Add canning jars (I use half pints for this recipe) and boil for about a minute to sterilize jars. Retrieve jars with kitchen tongs and invert on a clean towel. Add additional water to pot if needed to return to original water level and turn down to a simmer while jam is being prepared.


Rinse your berries well. If you've picked them fresh you'll need to make sure you haven't got any stems or stray critters in the mix. Once well rinsed and strained, pour into a heavy bottomed pot and add lemon juice. Place on the stove over medium heat. Stir in pectin. Bring berry mixture to a rolling boil stirring constantly.

Add sugar to boiling berry mixture. Stirring constantly, bring back to a rolling boil.  Boil hard for 1 minute. Turn off heat.

Ladle hot jam into the sterilized jars. Be sure to keep rims of jars clean - wiping with with a wet cloth as needed. Place lids on top of the jars and tighten rings.

Process in a boiling water bath for 10 minutes. Turn off heat and allow to sit in water for another 5 minutes. Remove and allow to cool before storing.

Makes about 8 half pints.

I find that homemade jams make excellent frugal christmas gifts for co-workers, neighbors and friends!