Menu Bar

Sunday, December 15, 2013

Cookies of Christmas - Chocolate Peanut Butter Candy Cookies

Christmas cookie baking in our house starts well ahead of Christmas - as does freezing and stashing away in the freezer. As you can imagine, my husband doesn't take very well to having dozens of fresh cookies in the house every weekend and not being able to eat any. These cookies are one of his favorite pre-Christmas treats which I let him eat while I save up all the other goodies for Christmas parties and cookie trays. The peanut butter M&M put these right over the top!


Chocolate Peanut Butter Candy Cookies
2 cups flour
3/4 cups cocoa
1 tsp baking soda
1/2 tsp salt
1 cup (2 sticks) butter, softened
1/4 cup peanut butter
2 cups sugar
2 eggs
2 tsp vanilla
1 package Peanut Butter M&Ms

Preheat oven to 350.

Stir together the flour, cocoa, baking soda and salt. I use a wisk to mix everything well. Set aside.

In a mixer cream together butter and sugar until fluffy. Add peanut butter, eggs and vanilla and beat well. Gradually add flour mixture and mix until well combined.

Stir in M&Ms. I always stir mine in by hand to keep them whole and avoid getting little chunks of M&M.


Spoon or scoop dough onto a cookie sheet. I like to make mine with an ice cream scoop for night big cookies. These cookies will hold their size and shape when they bake, so you can place them fairly close together.


Bake 8-10 minutes. Remove from oven, allowing them to sit 1-2 minutes on the cookie sheet before transferring to a rack or wax paper to cook fully.


Good luck keeping these around until Christmas!


Monday, December 9, 2013

Cookies of Christmas - Gingersnaps

When I was little, my mom didn't bake a lot, but at Christmas time she always made these gingersnaps. They were a favorite - especially for my Dad. Since I have moved out on my own, I make these cookies every year. Popping White Christmas into the DVD player and eating one of these cookies always takes me back. The amazing mix of spices and molasses gives these a great traditional flavor. If you like spice, you'll love these - they smell amazing too!

Gingersnaps


2 cups flour
1/2 tsp salt
1 tsp cloves
1 tsp cinnamon
1 tsp ginger
3 tsp baking soda
3/4 cup shortening
1 cup sugar
1 egg
1/4 cup molasses

Preheat oven to 350.
Start by combining your flour, salt, spices and baking soda in a medium sized bowl and place off to the side. I use a whisk to combine all the ingredients well.


Cream the shortening on medium speed with a mixer. Add sugar and mix until smooth. Stir in eggs and molasses.


Add the flour mixture slowly and continue mixing until all is combined. 

Roll dough into 1/2 inch balls. Roll in sugar to coat. I like to large sugar crystals or sanding sugar - which makes the finished cookies glitter!


Bake 8-10 minutes.

Remove to a rack and allow to cool.


These cookies freeze really well - up to 6 weeks in advance without losing their flavor. The original recipe makes about 3 dozen cookies and doubles really well. It's a great pick for a cookie exchange!

Sunday, December 8, 2013

Cookies of Christmas - 2 Twists on the Classic "Blossom" Cookie

Peanut butter blossoms are a Christmas staple. Almost all cookie bakers have their cherished recipe for them and I'm no exception. For those of you that don't know what I mean - think those peanut butter cookies with the Hershey's Kiss in them.

As much as I'm a sucker for a classic though, I can't resist putting all those new kinds of kisses Hershey's has come out with to work. Here's my two twists on the classic. These were so good they might just become new classics in my house!


Chocolate Mint Blossoms


1/2 cup shortening
1/2 cup butter
1/2 cup sugar
1/2 cup brown sugar
1 egg
2 Tb milk
1 tsp peppermint extract
1 1/2 cups flour
3/4 cup cocoa
1 tsp baking soda
1/2 tsp salt
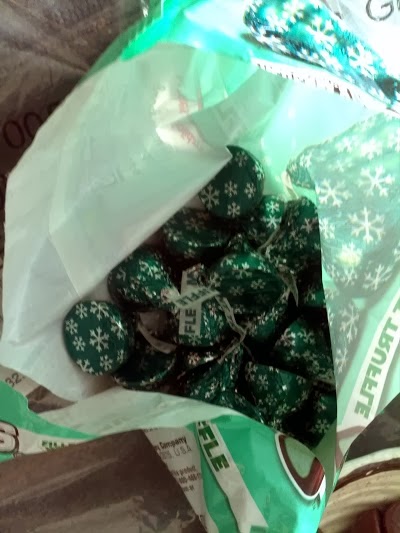
42 Mint Truffle Kisses (You can also use plain kisses if you like)
Additional sugar (to roll cookies in)


In a small bowl mix together flour, cocoa, baking soda and salt. Set aside. In a stand mixer cream together shorting, butter and sugars until light and fluffy. Mix in egg, milk and peppermint extract. Slowly add in the flour mixture. Mix until well combined. Refrigerate dough for one hour.

Put sugar in a small bowl. Roll chilled dough into ping pong sized balls. Roll in the sugar until coated.


Place on a cookie sheet and bake about 8 minutes, until almost done. While cookies are baking unwrap chocolate Hershey's Mint Truffle Kisses. If you can't find the mint truffle - substitute with another Kiss of your choice or with chocolate stars.

When cookies are almost done, pull out of the oven and press a Kiss gently down into the middle on them. Bake for another one minute to soften kiss. Remove from the oven. Allow to cool on the pan for about a minute until removing to a rack to finish cooling.


Candy Cane Mint Blossoms

1/2 cup shortening
1/2 cup butter
1 cup sugar
1 egg
2tb milk
1 tsp vanilla extract
2 cups flour
1 tsp baking soda
1/2 tsp salt
42 Candy Cane Kisses


In a small bowl mix together flour,baking soda and salt. Set aside. In a stand mixer cream together shorting, butter and sugar until light and fluffy. Mix in egg, milk and peppermint extract. Slowly add in the flour mixture. Mix until well combined. Refrigerate dough for one hour.


Put sugar in a small bowl. Roll chilled dough into ping pong sized balls. Roll in the sugar until coated. Place on a baking sheet and bake for about 8 minutes.

While the cookies are baking, unwrap your kisses.

When cookies are almost done, pull out of the oven and press a Kiss gently down into the middle on them. Bake for another one minute to soften kiss. Remove from the oven. Allow to cool on the pan for about a minute until removing to a rack to finish cooling.


Using this basic recipe the combination of extracts, chocolate and white dough and candy kisses is endless. Mix and match to find your new Christmas Classic.

Cookies of Christmas - Santa's Snowballs (A No Bake Recipe!)


While I love baking year-round, there is something about baking at Christmas time that is even more special. This is the time of the year that I dig into my cooking binder and pull out my favorite cookie recipes. Some of them are ones I've been enjoying since I was a little girl and now make for my own friends and family. Others are newer recipes that I've picked up along the way from friends, magazines and my own experimentation. All of them contribute to one of my favorite times of year. 

In this season of giving - I'd like to share with you my favorite Christmas recipes - my cookies of Christmas. I hope you enjoy them as much as we do. As a note - all of these recipes (unless noted) can be made as much as a month in advance of Christmas. I always start my Christmas baking at the end of November - making a few batches per weekend. By Christmas I have a huge variety of cookies for parties and to give as gifts. All I have to do is pull them out of the freezer and share!

The first cookies I'm sharing were my hands down favorites growing up. My grandma made them every year for Christmas. I loved them so much, many years she'd make me my own batch. I was always amazed by the layer effect and amazing filling. I could never figure out how she made them. I had visions of her spending hours in the kitchen making these special cookies.

When I grew older and she shared the recipe with me - I realize how easy - and ingenious - these cookies are. In the years I've taken up making these I've been asked for the recipe many times. Everyone is surprise when they find out the ingredients - now I'm sharing with you.

One secret to these is critical - make them ahead at least a week - preferably 2 - from when you want to serve them and freeze. The freezing softens them to a cake-like consistency and really makes the cookie. Trust me on this one - if you skip the freezing taste them immediately after making you won't understand why I love them so much.


Santa's Snowballs
1 box Vanilla Wafer Cookies
1 container spreadable strawberry cream cheese
1 container vanilla frosting
Coconut
Food coloring (optional)


Start my making an assembly line of all your ingredients - this will make it easier in the long run to do everything in order.

Take a vanilla wafer and spread with a small smear of cream cheese.


Top with another wafer.

Spread with an additional smear of cream cheese.

Top with a third wafer - you have layer wafer cream cheese ball of sorts.


Front the wafer ball with your frosting. (Sorry - there is no un-messy way to do this!)


Roll your wafer ball in coconut.


Once made, place your cookies in a freezer bag and freeze at least 1 week. Thaw and serve!


For a festive touch, you can tint your coconut red or green. Place the coconut in a plastic zipper bag. Add a few drops of food coloring and knead until coated.


Friday, December 6, 2013

Bread Day

What an crazy fall it has been! Between work, family time and everything else going on, it's been difficult to dedicate much time to anything in the house. However, as the weather gets colder as much as I don't look forward to driving with those little white flakes, I'm looking forward that seasonal excuse to get back into the home and enjoy those simple pleasures. Knitting, baking and housework...here I come!

This week our local grocery store had a great sale on flour (including wheat!) and sugar and provided a great opportunity to stock up. This inspired me to dedicate a batter part of my Sunday to baking fresh bread. It's amazing once you get started how easy it is to just keep going. I ended up with 7 loaves of bread and 4 dozen cinnamon rolls ... plenty to enjoy and still have leftovers in the refrigerator. Boy was I tired by the time I got done!

The stand out what this amazing whole wheat oatmeal bread. I love the texture of a good oatmeal bread and wanted to bring in the whole wheat flour. I ended up with this fabulous, hearty bread ...which makes an excellent toast spread with homemade jam!


Oatmeal Wheat Bread
3 cups wheat flour
1 cup oatmeal
2 TB butter
1 1/2 tsp salt
3 TB Molasses
2 teaspoons yeast (1 packet)
1 1/4 cup lukewarm milk

Warm your butter in the microwave for about 15 seconds, add milk and heat another 30 seconds to 1 minute until lukewarm. You DO NOT want your milk to be hot, or you will kill your yeasts. Pour the milk and butter mixture into the bowl of your mixer (or a large bowl if you will be mixing by hand) and add your yeast and salt. Using a whisk, gently mix together until your yeast is dissolved.

Add your remaining ingredients to the bowl, and using your dough hook, mix on your mixers lowest setting until the ingredients are combined. If you have a flour shield, you'll want to use it! Continuing on that lowest setting, kneading with your dough hook for an additional 5 minutes. You may need to sprinkle in some additional flour if your dough is too sticky to come together. Your dough is sufficiently kneaded when you press a finger into it gently and it springs back. Note - if kneading by hand, you will need to knead for about 8-10 minutes.

Prepare a large, clean bowl with cooking spray. Place your dough ball in the bowl, cover with a kitchen towel and allow to rise in a warm spot for about 1 hour.

After risen, punch down the dough, form into a log and place in a greased loaf pan. Cover again with your towel and allow it to rise for an additional hour.

Bake your bread at 350 for about 35 minutes.


Good luck keeping this one around long enough for it to cool!