Today's project - the fridge. Here's what it looked like before. Sadly enough - this picture was AFTER I cleared off a couple things - scary I know!
First I wanted a chalkboard menu board look for my fridge, but I am not brave enough to actually paint the fridge itself - though I've seen some amazing examples of this on pinterest. I settled for a
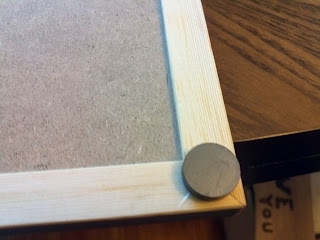
pre-made chalkboard from my local craft store that was about the size of my freezer door and some extra strength craft magnets.
To adhere the magnets - nothing beats good ol' hot glue. I got my mini gun warming up to start.
Next, I adhered the magnets to the back using the hot glue. I used 10 total around the edges.
Viola - the only thing left to do is fill out my board using some colored chalk - also from the local craft store:
Now that I had my menu board in place, the next task was tackling the pile of photos and papers everywhere on my fridge. I started by painting some plain clothe pins with burgundy colored spray paint. I like to spray small objects inside a large shallow box to minimize mess.
Once completely dry I broke out my trusty glue gun once again and attached extra strength refrigerator magnets to the clothes pins.
It's as easy at that - the pins can be used to clip papers and photos.
Of course my husband (a bit adverse to change) had to make his mark. Once he was done, I ended up with a little magnet row:
At least, though I got to send quite a few to the magnet graveyard!
Finally - I needed to tackle the top of my fridge. Here's the before.As you can see - the top of our fridge as doubling as a bar/junk storage area.
I found these really neat chalkboard front bins on half price sale as Joanne Fabrics. I used one to corral up all those liquor bottles and a second for cearal and other misc items from the top of my fridge.
Here's the before and after with everything included:


No comments:
Post a Comment